Alex
Tonyhax International -> Japanese PS2 Console Loader Instructions
Requirements:
- Any real Japanese (NTSC-J region) PS1 CD-ROM game disc.
- A swap magic tool.
- Being OK with modifying/removing the disc drive faceplate of the console.
- Anything else required by the entry point.
Supported Entry Points
Removing The DVD Drive Tray Front Panel
The below explanation is specific to the SCPH-10000 model I have and differs on other models. Please make sure your doing the right proccess for your console model.
1) Turn on the Japanese PS2 console. Eject the DVD drive tray, and while it is open power off the console by either pulling the plug from the wall or PSU in the back of the console, or by flicking the power switch for the PSU on the back of the console. You can not use the power button because then the DVD drive tray will close before the console turns off. Now, flip the Japanese PS2 console upside down like in the image below:
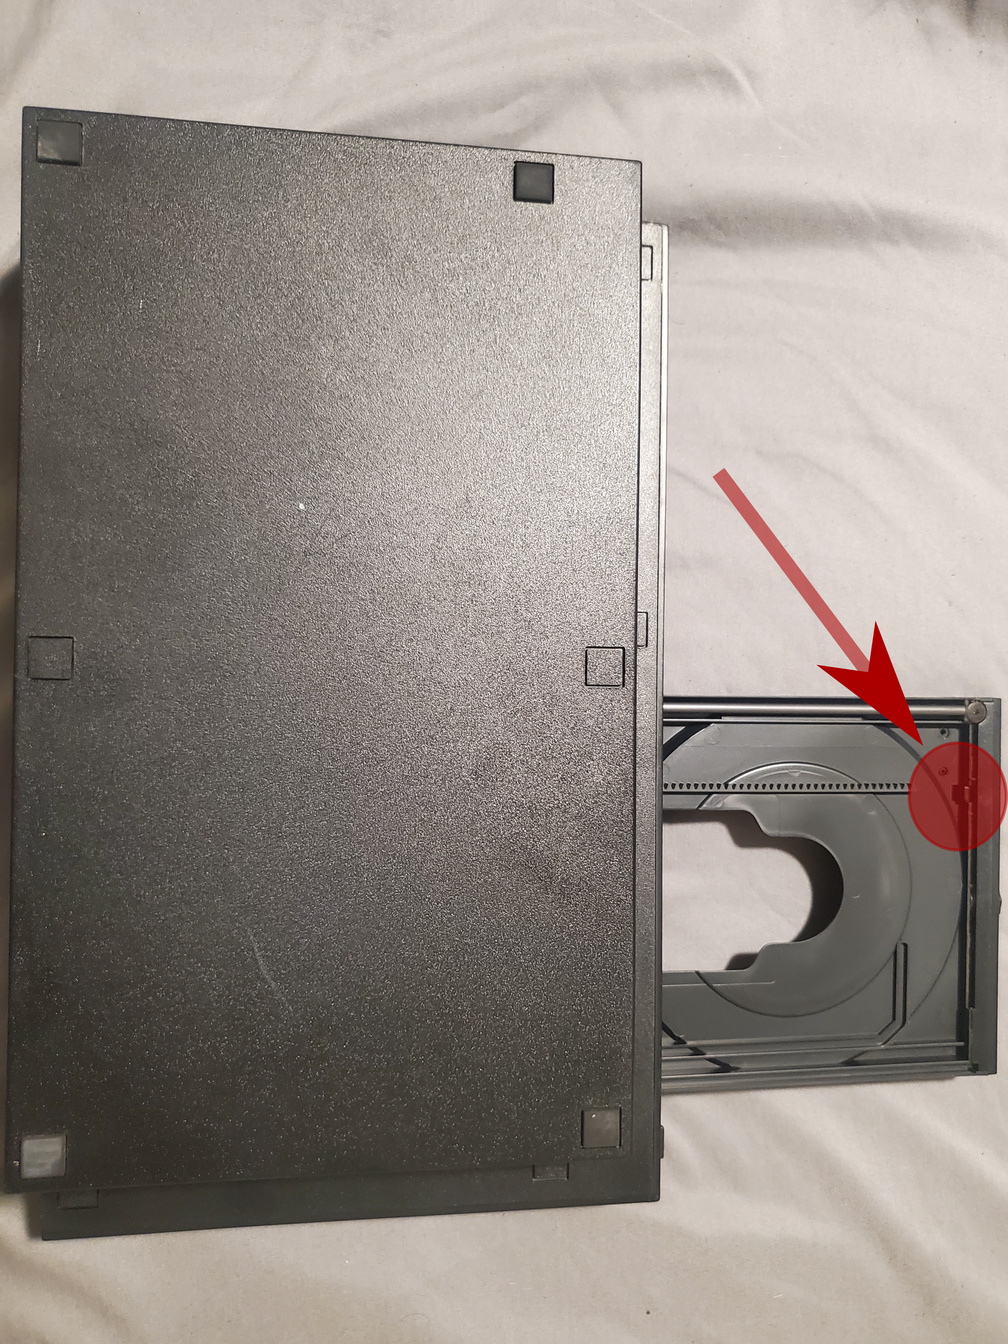
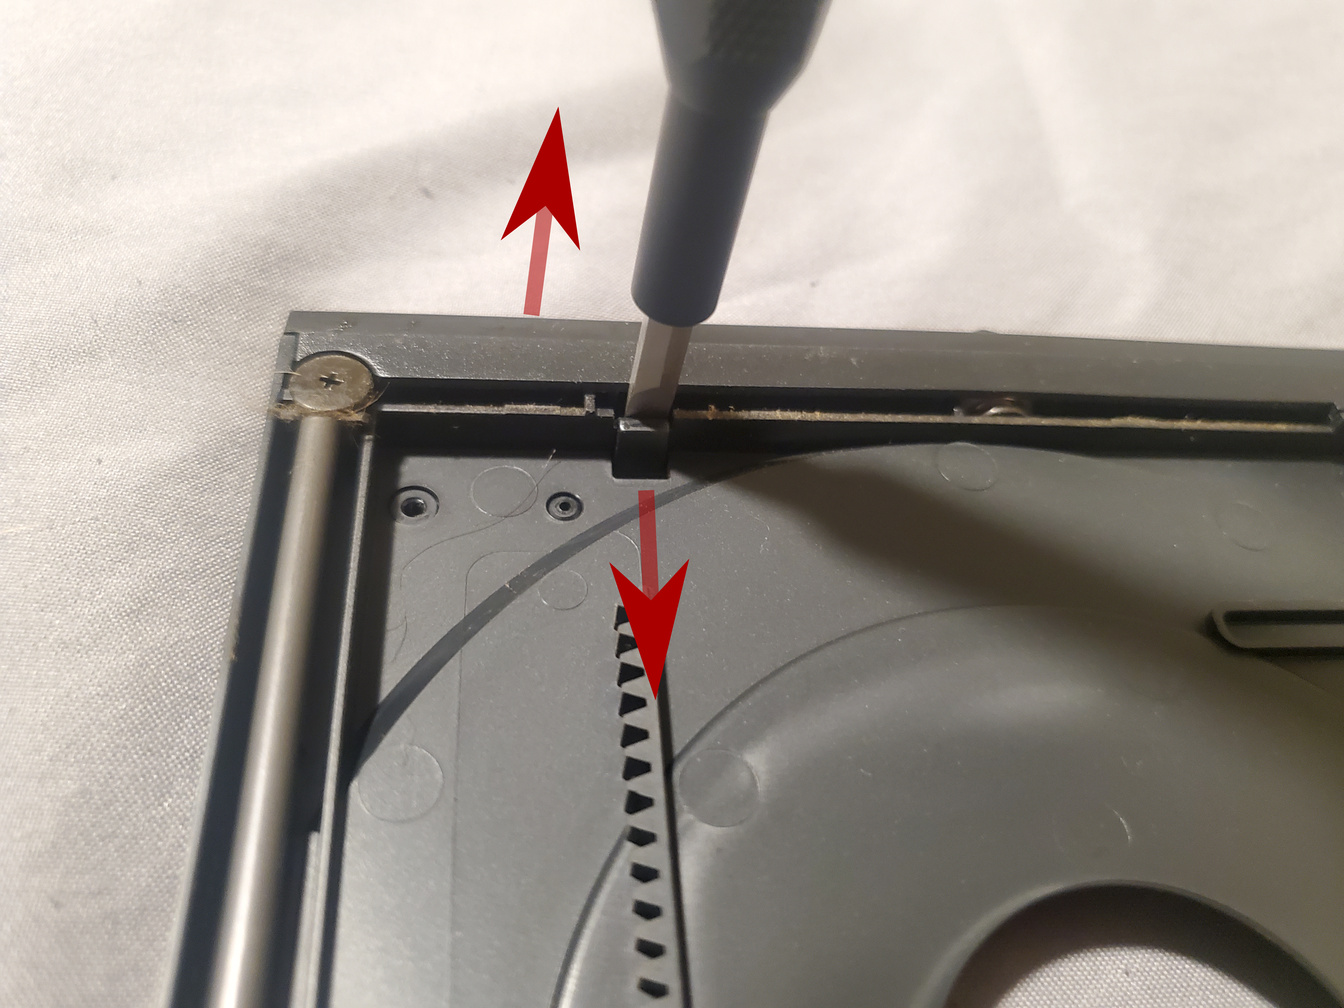
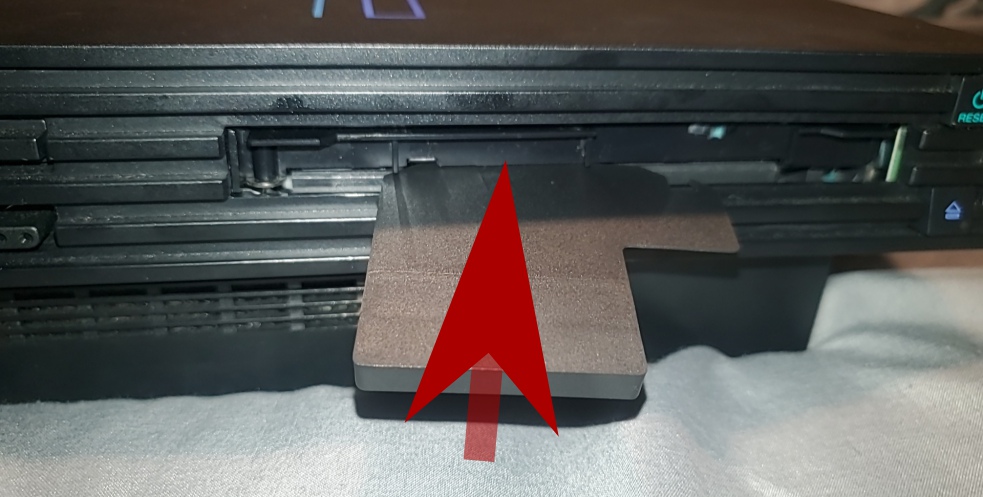
2) Bring your focus to the bottom of the opened DVD drive tray. At the very top edge (highlighted in the picture above) is a tab. You want to jam a thin flat head screwdriver in between this tab and the DVD drive tray face plate as shown in the image below. Now, push with the flat head screwdriver to separate the DVD drive face plate from the rest of the DVD drive tray. Be very gentle and only use a direct straight force towards the face plate. Do not go side to side when doing this or you risk breaking off an edge of the DVD drive tray. I am obviously not responsible for any damage you may do by doing this! Once successful, the face plate will become removable. You are free to slide it back on at a later time, it just needs to be off for you to use the Japanese PS2 to boot backup/import PS1 games with Tonyhax International.
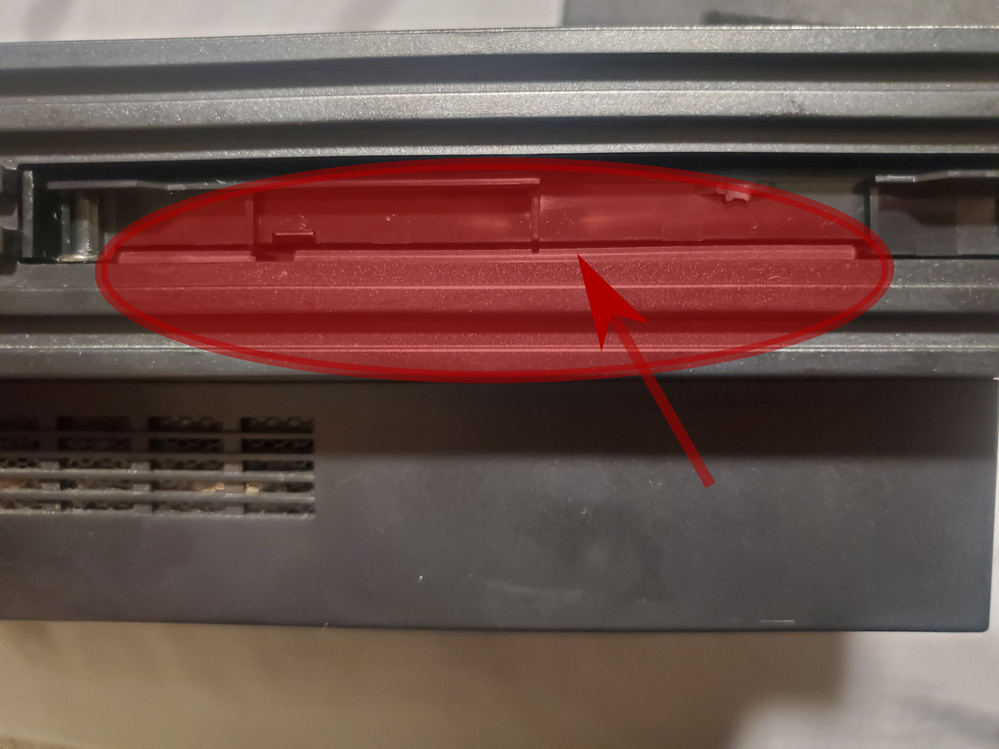
3) With the DVD drive face plate off, flip over the Japanese PS2 console right side up. You can now see a gap at the bottom of the DVD drive. This is where you place the Swap Magic Tool in when using Tonyhax International on your Japanese PS2 console.
Using The Loader
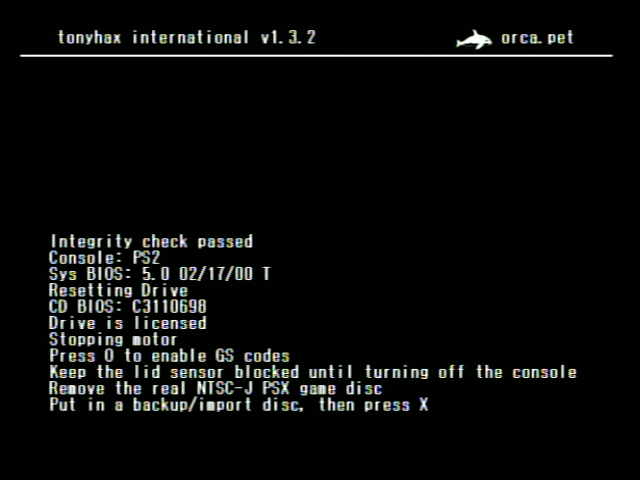
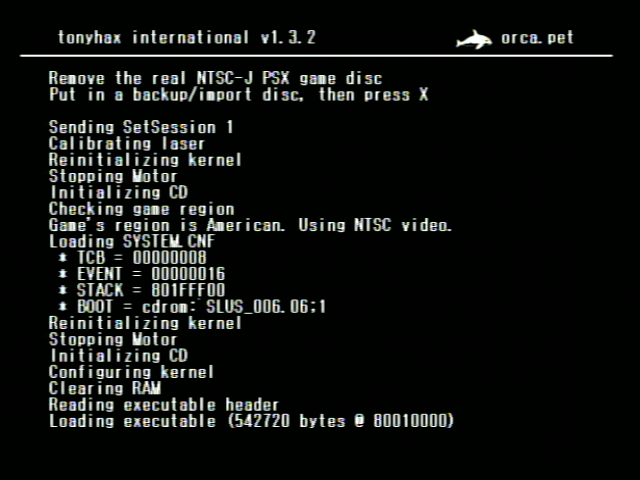
Once you see the text Put in a backup/import disc, then press X appear, you need to use a Swap Magic Slide Tool to release the DVD drive to gain access to it without pressing the eject switch. A video tutorial is available that shows how to use the Swap Magic Tool (in general), although the exact steps are also explained below and applies to all ‘fat’ PS2 console models. Once you use the Swap Magic Tool to swap in your import/backup CD-R while booted in the Tonyhax International loader, just press the cross button on your controller to boot and play your game.
Important note: do not eject the PS1 import or backup CD-R from the Japanese PS2 console until your done playing the game. Unlike American and European consoles (which do not have this limitation), if you do so your game will stop working, and you will have to start Tonyhax International all over again to boot your import/backup CD-R and start playing again.
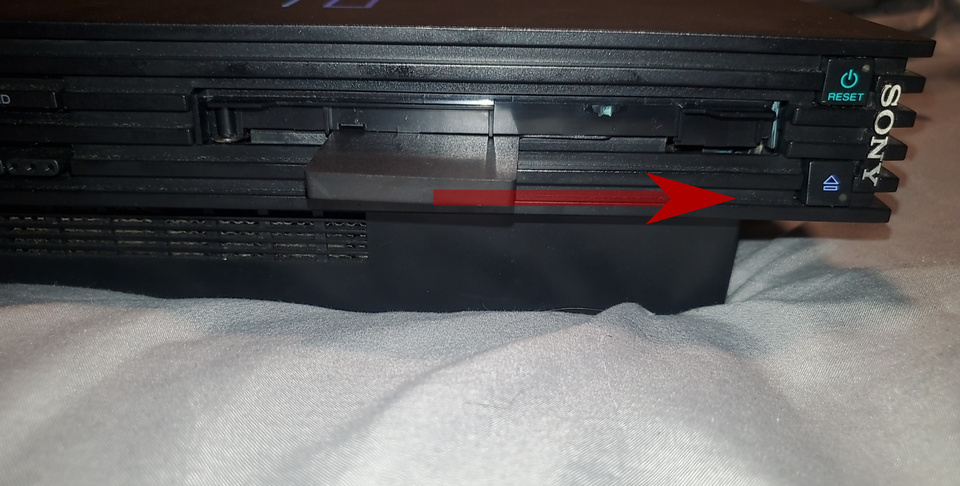
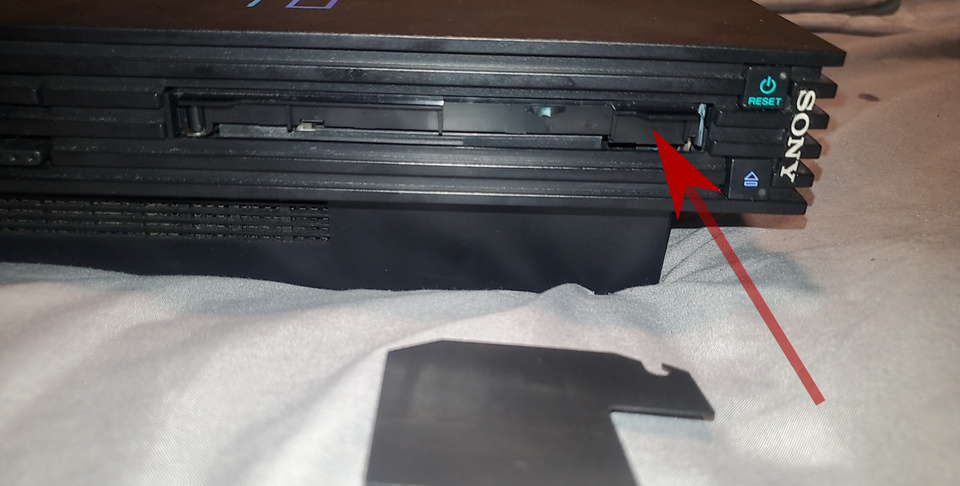
1) Slide in the Swap Magic Tool like shown in the image below by the arrow. You need to feel around with the Swap Magic Tool to get the hook to latch on internally inside the DVD drive.
2) Now that your Swap Magic Tool is latched on internally inside the DVD drive, move it straight to the right side. This movement will feel correct and nice when you are properly using the Swap Magic Tool, reassuring you are using it correctly. Once you get to the end of this movement the DVD drive tray will begin to move forward out of the DVD drive, “releasing” it from it’s locked state.
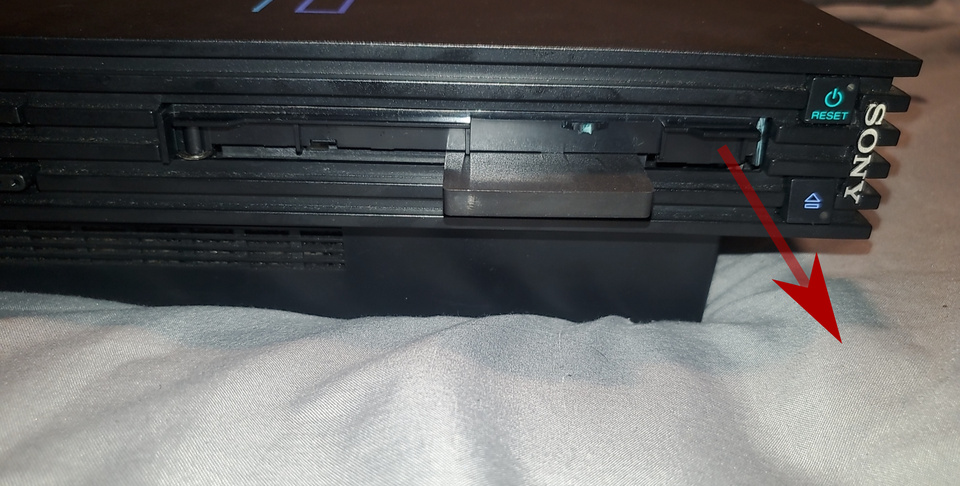
3) Use your hand to pull out the DVD drive tray to gain access to the disc in it. Remove the original NTSC-J PSX game disc, and put in your import/backup CD-R.
4) With your import/backup CD-R in the Japanese PS2 console, use your hand to push in the DVD drive tray as far as it will go back into the DVD drive.
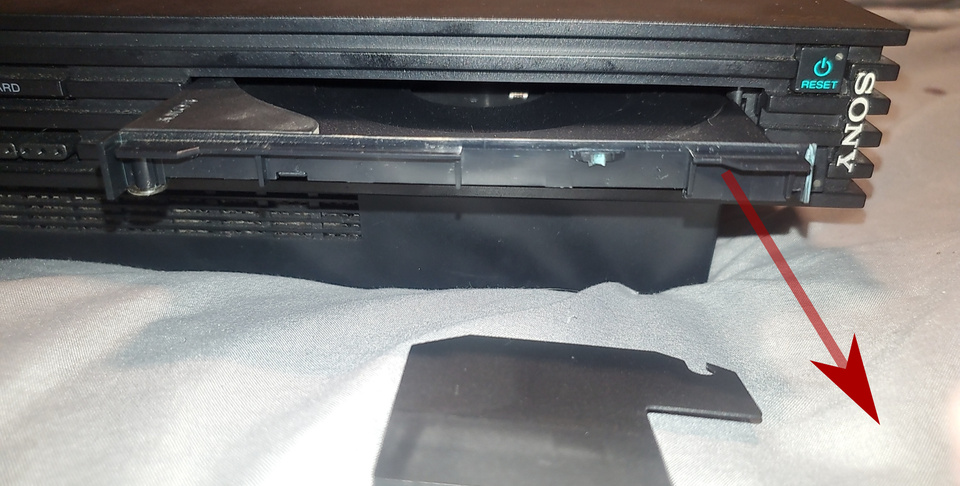
5) Now that the DVD drive tray is pushed all the way back in, the Swap Magic Tool can be used to “lock” the drive. Like before, slide in the Swap Magic Tool to the right most position like shown in the image below. Remember to feel around with the Swap Magic Tool to get the hook to latch on internally inside the DVD drive. Now that your Swap Magic Tool is once again latched on internally inside the DVD drive, move it straight to the left side. This movement will feel correct and nice when you are properly using the Swap Magic Tool, reassuring you are using it correctly. Once you get to the end of this movement (when you can’t go any more to the left) the DVD drive tray will fully go back inside the DVD drive to put the DVD drive into the “locked” state. You must ensure that the DVD drive is fully back in or Tonyhax International will lock up loading the disc.

Playing Games With Multiple Discs
Unlike USA/PAL consoles, Japanese consoles do not have the ability to play multi-disc games normally due to the lid sensor block. However, most multi-disc games allow you to save before prompting for disc change in-game. This allows you to reset the console, restart Tonyhax International, boot the next disc, and then load the save made from the previous disc. Some games don’t allow this however, such as Parasite Eve, Chrono Chross, and Fear Effect. Let me know in a Github Issue if you have found other games like this.
If you really must play a multi-disc game on your Japanese console without powering it off and starting up the next disc with the loader, you can perform a mid-game hot-swap-trick but I highly don’t recommend doing this since you risk damaging the console and your discs. A proper software-based seamless workaround is planned for the Japanese consoles but not yet implemented. Anyways, here’s how you do it:
This swap trick method probably will suffice but I haven’t tried it nor am I interested in it since again the goal is to implement a software-based approach to workaround this issue for all Japanese consoles. Just follow it when the game prompts you for the next disc.